簡単に作れるスライドショー手順
シリウスでは、いくつものスクリプト...複数の種類でスライド効果は発生させることが
できますね..
でも、特殊なスタイルはいらない...普通のものでよいとも理解する方はおられます。
最初は凝っていても...いずれは設定が面倒で飽きてくる...?
私は該当しますね..
でも、いつの日か使うことがあるかもしれない予備の知識としてサイト記載している
容易な...面倒回避する...簡単構造をご案内しますね..
ほとんどただのスライド効果をCSS形成ですぐに作っちゃいましょう..
...というわけなんですね...面倒を省く点では速攻ですね...と思いますが?..
ついでにいえば、サーバー負担も少ない....現在は軽いが大事な要素と理解します。
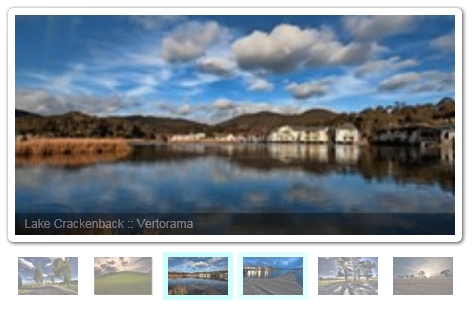
では作動を、ご覧ください..


画像リンクは入れられますが、マウスオーバーもなし、ストップも戻りもございません..
あくまで、デフォルト...これでよい方は以下へ進みましょう...
HTML
<div id="boerd">
<div id="photo1" class="pic"><img src="<% pageDepth %>img/画像1.jpg"style="height:338px;width:600px;" alt="" /></div>
<div id="photo2" class="pic"><img src="<% pageDepth %>img/画像2.jpg"style="height:338px;width:600px;" alt="" /></div>
<div id="photo3" class="pic"><img src="<% pageDepth %>img/画像3.jpg"style="height:338px;width:600px;" alt="" /></div>
<div id="photo4" class="pic"><img src="<% pageDepth %>img/画像4.jpg"style="height:338px;width:600px;" alt="" /></div>
<div id="photo5" class="pic"><img src="<% pageDepth %>img/画像5.jpg"style="height:338px;width:600px;" alt="" /></div>
<div style="padding:28%;background:transparent;"></div>
</div>
画像を5つ用意して、画像コードだけ書き換えてください
CSSは以下....スタイルシートへ書き足し
#boerd {
position: relative;
max-width: 600px;
margin: 0 auto;
overflow: hidden;
}
.pic img {
position:absolute;
width: 100%;
top:0;
left:100%;
-moz-animation: imgTrans 30s infinite;
-webkit-animation: imgTrans 30s infinite;
animation: imgTrans 30s infinite;
}
#photo1 img {
-moz-animation-delay: 0s;
-webkit-animation-delay: 0s;
animation-delay: 0s;
}
#photo2 img {
-moz-animation-delay: 6s;
-webkit-animation-delay: 6s;
animation-delay: 6s;
}
#photo3 img {
-moz-animation-delay: 12s;
-webkit-animation-delay: 12s;
animation-delay: 12s;
}
#photo4 img {
-moz-animation-delay: 18s;
-webkit-animation-delay: 18s;
animation-delay: 18s;
}
#photo5 img {
-moz-animation-delay: 24s;
-webkit-animation-delay: 24s;
animation-delay: 24s;
}
@-webkit-keyframes imgTrans {
0% { left:100%; }
5% { left:0%; }
20% { left:0%; }
25% { left:-100%; }
100% { left:-100%; }
}
@-moz-keyframes imgTrans {
0% { left:100%; }
5% { left:0%; }
20% { left:0%; }
25% { left:-100%; }
100% { left:-100%; }
}
@keyframes imgTrans {
0% { left:100%; }
5% { left:0%; }
20% { left:0%; }
25% { left:-100%; }
100% { left:-100%; }
}
ここまで....で、終わり
ご注意
横サイズを600にしていますね..
この数値の際は、記事カラムが600px以下の場合は、一週目はさほどずれは
見られませんが、2週目からずれます...
ですので、600px以上の記事カラムで使用..
もしくは、横サイズをHTML及びCSSで書き換えてください...
スポンサーリンク
- 回転登場スライド効果、そして退場型
- 背景奥から全面に回転しながら登場するスライド画像...そしてお役目終了で奥に引き込まれる...詳細はサイトで....
- 横ブラインド形状スライド効果
- シリウスに取り付け可能な横ブラインド形状のスライドショー効果を発生させる...ソース、CSSを追加しておりますので作動をご覧ください
 サイトマップ
